How Linux Survives Severe Memory Failure: Diagnostics and Error Handling
Introduction
This article documents a troubleshooting process in which a Fedora 44 system started showing strange symptoms. At first, I assumed the issue was caused by a software bug introduced by an update, but eventually the real cause was revealed: the RAM itself was physically defective.
The most surprising part was how well Linux continued functioning despite severe memory corruption.
⚠️ Warning: This article describes a serious hardware fault.
If you encounter similar symptoms:
- Back up your data immediately
- Avoid writing to disk (corruption may worsen)
- Test memory thoroughly
- Do not attempt to repair soldered RAM without professional skills
Early Symptoms
First Error Messages
The problems started after upgrading to Fedora 44. During boot, the system began displaying errors like:
BTRFS critical (device dm-0): unable to find chunk map for logical 281564888793088 length 16384
BTRFS error (device dm-0): error loading props for ino 6266461 (root 5): -5
Some applications also started crashing randomly. Initially, I assumed this was caused by a software bug or filesystem corruption related to the Fedora KDE 44 upgrade.
Initial Diagnostics
I checked the SSD health using SMART data:
sudo smartctl -a /dev/nvme0n1
The results looked completely healthy:
SMART Health: PASSED
Media and Data Integrity Errors: 0
Critical Warning: 0x00
BTRFS statistics were also clean:
sudo btrfs device stats /
[/dev/mapper/luks].write_io_errs    0
[/dev/mapper/luks].read_io_errs     0
[/dev/mapper/luks].flush_io_errs    0
[/dev/mapper/luks].corruption_errs  0
No errors at all.
This was contradictory: the system reported BTRFS failures, but the drive itself appeared healthy.
You can display boot-time BTRFS errors with:
sudo dmesg | grep -i "chunk map\|btrfs critical"
Because corruption_errs = 0, BTRFS itself had not lost or corrupted any data on disk. The system continued working because BTRFS fallback mechanisms skipped the invalid address and continued mounting the filesystem.
The key observation was:
BTRFS error (device dm-0): error loading props for ino 6266461 (root 5): -5
Finding the affected inode:
sudo find / -xdev -inum 6266461 2>/dev/null
/usr/lib/udev/rules.d/90-alsa-restore.rules
Checking the file:
ls -li /usr/lib/udev/rules.d/90-alsa-restore.rules
stat /usr/lib/udev/rules.d/90-alsa-restore.rules

sudo cat /usr/lib/udev/rules.d/90-alsa-restore.rules

sudo btrfs property get /usr/lib/udev/rules.d/90-alsa-restore.rules
The result:
cat: /usr/lib/udev/rules.d/90-alsa-restore.rules: Input/output error
This confirmed real but isolated corruption. Both cat and btrfs property produced I/O errors, meaning BTRFS could no longer read the data or metadata extents associated with that inode.
Attempting repair:
sudo dnf reinstall $(rpm -qf /usr/lib/udev/rules.d/90-alsa-restore.rules)
The reinstall failed and the filesystem was remounted read-only.
When BTRFS detects severe metadata or checksum corruption, the kernel automatically switches the filesystem into read-only mode. This safety mechanism prevents additional corruption and protects remaining data.
You can verify mount status with:
findmnt / -o OPTIONS
And check remount messages:
sudo dmesg | grep -i "btrfs.*remount\|read-only\|forced readonly"
At this point the SSD still appeared healthy, which raised a critical question:
What if corrupted data was being written because the memory itself was faulty?
That led to suspicion of defective RAM.
Memory Testing: Layer by Layer Toward the Truth
Phase 1: Quick Test (Lenovo Diagnostics)
I ran Lenovo’s built-in quick memory diagnostics from the boot menu.
Result: PASSED
No errors detected.
Phase 2: Linux + Memtester
I installed and ran memtester:
sudo dnf install memtester
sudo memtester 4096 3
Result: all tests passed.
At this stage I still believed the issue was software-related.
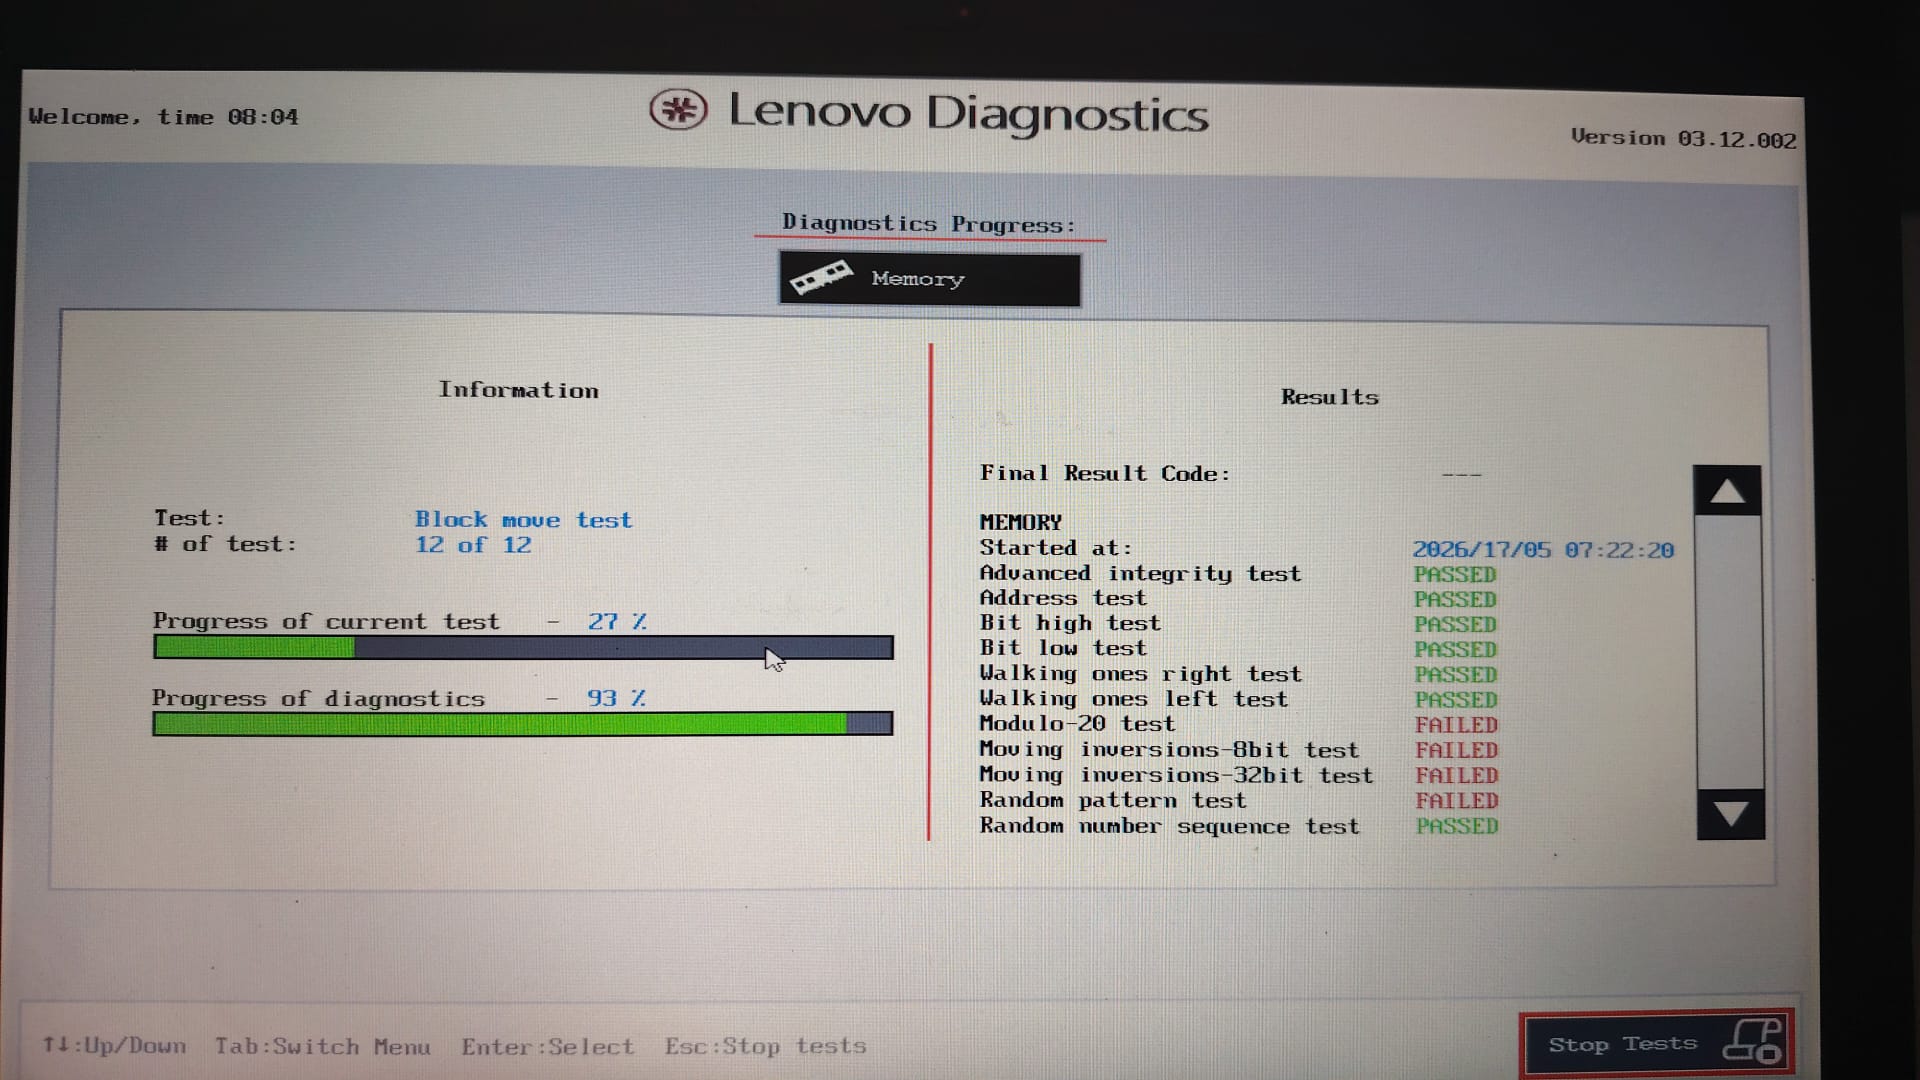
Phase 3: Lenovo Advanced Memory Test (3 hours)
Next I ran Lenovo’s advanced diagnostics memory test from the boot menu. The test took roughly three hours.
First Run
Random pattern test FAILED
Second Run (Condition worsening)
Modulo-20 test                FAILED
Moving inversions-8bit test   FAILED
Moving inversions-32bit test  FAILED
Random pattern test           FAILED
The RAM was clearly failing.
The problematic DDR4 chip was soldered directly onto the motherboard using BGA balls.
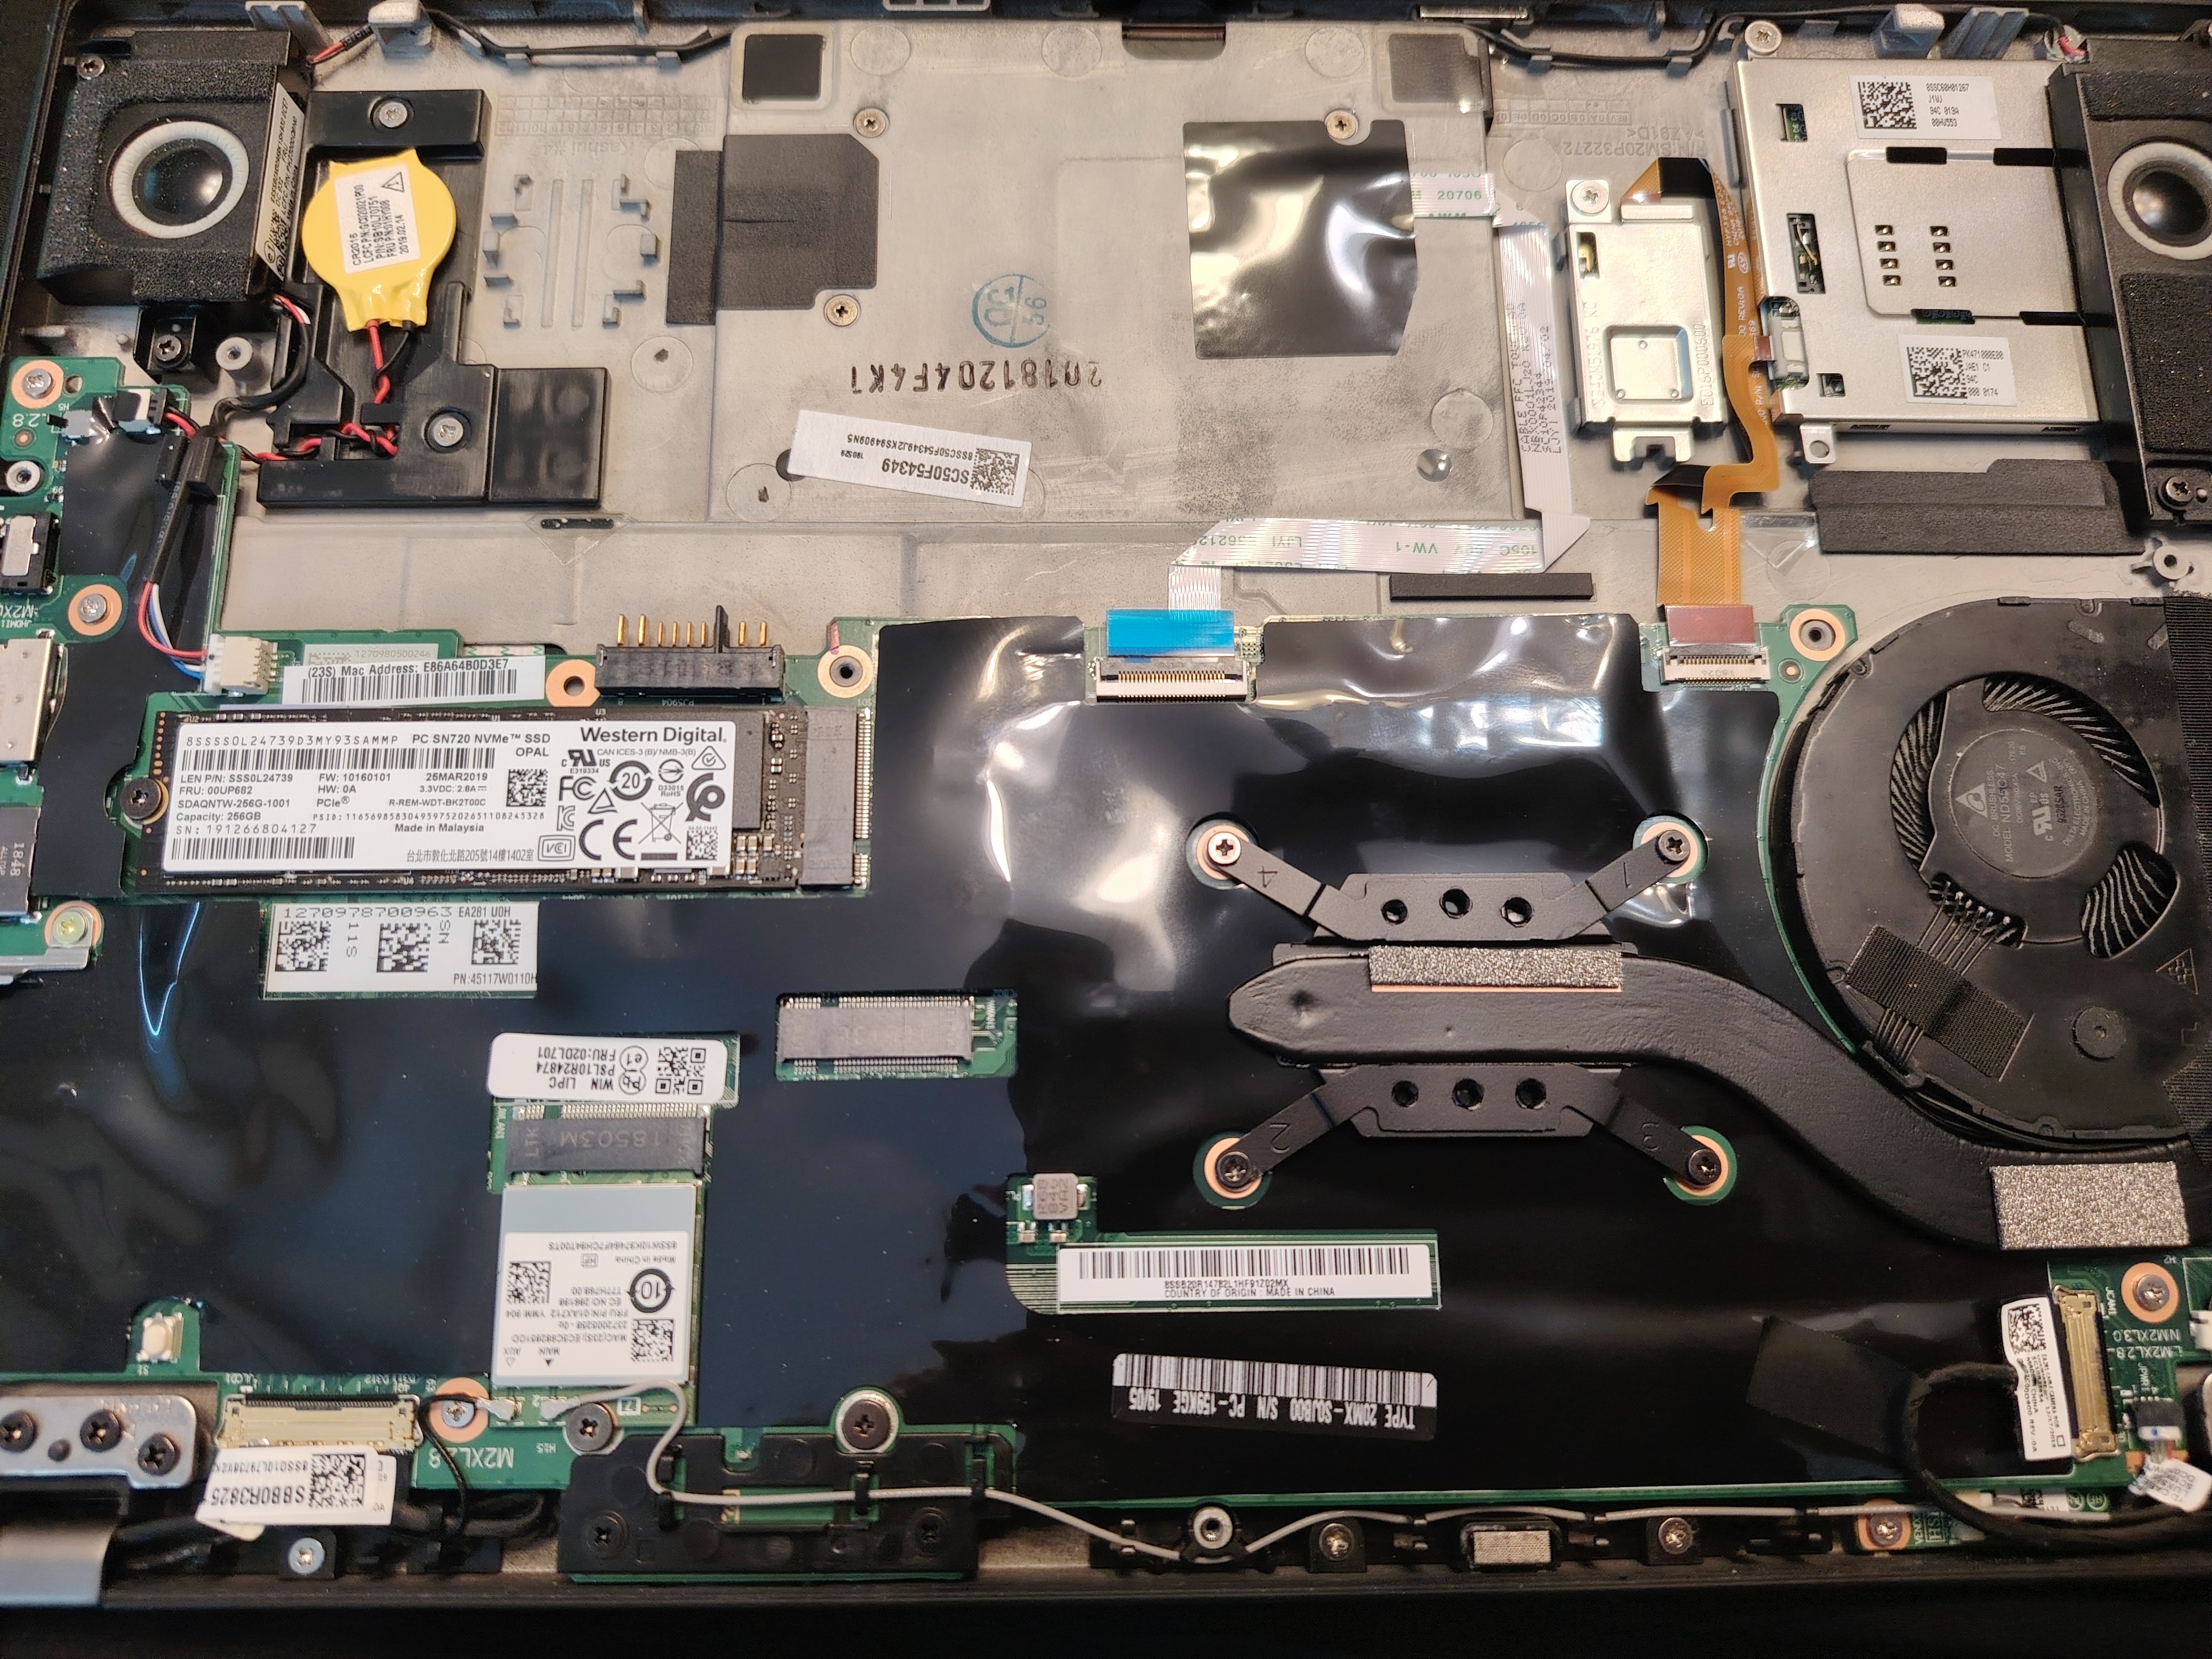
Repair Requirements
- BGA rework station
- Microscope (10–40x)
- Replacement DDR4 chip
- Professional soldering skills
Estimated Cost
~150–300 €
Recommendation
Consider replacing the laptop instead 😄
Why Did Linux Keep Working?
Linux contains multiple layers of fault handling.
Page Fault Handling
When memory becomes unstable, the kernel attempts recovery mechanisms:
dmesg | grep -i "page fault\|segfault"
Hardware Error Handling (MCE)
dmesg | grep -i mce
journalctl -k | grep -i "hardware error"
BTRFS Error Handling
BTRFS is specifically designed to detect corruption.
Checksums
Every block is checksummed during writes. On reads, the checksum is validated.
If the checksum fails:
BTRFS error (device dm-0): error loading props for ino 6266461 (root 5): -5
Copy-on-Write
Writes always go to new blocks first. Existing data remains untouched until the write succeeds.
Metadata Duplication
BTRFS stores metadata redundantly. If one copy is corrupted, another may still be readable.
Read-Only Fallback
When severe corruption is detected:
BTRFS: error (device dm-0) in ... : errno=-5 IO failure
BTRFS info (device dm-0): forced readonly
The filesystem becomes read-only, preventing further damage while still allowing data recovery.
Why Did Applications Crash?
User-space applications are much more vulnerable to memory corruption.
- Random bit flips changed variable values
- Shared libraries failed to load
- Corrupted pointers caused segmentation faults
Why Didn’t Memtester Detect the Fault?
The memtester is useful, but limited:
- It only tests currently available RAM
- Short runs may miss temperature-dependent faults
- It does not cover every memory pattern
Lenovo’s advanced diagnostics:
- Runs for hours
- Tests every memory cell
- Uses aggressive patterns like random sequences and moving inversions
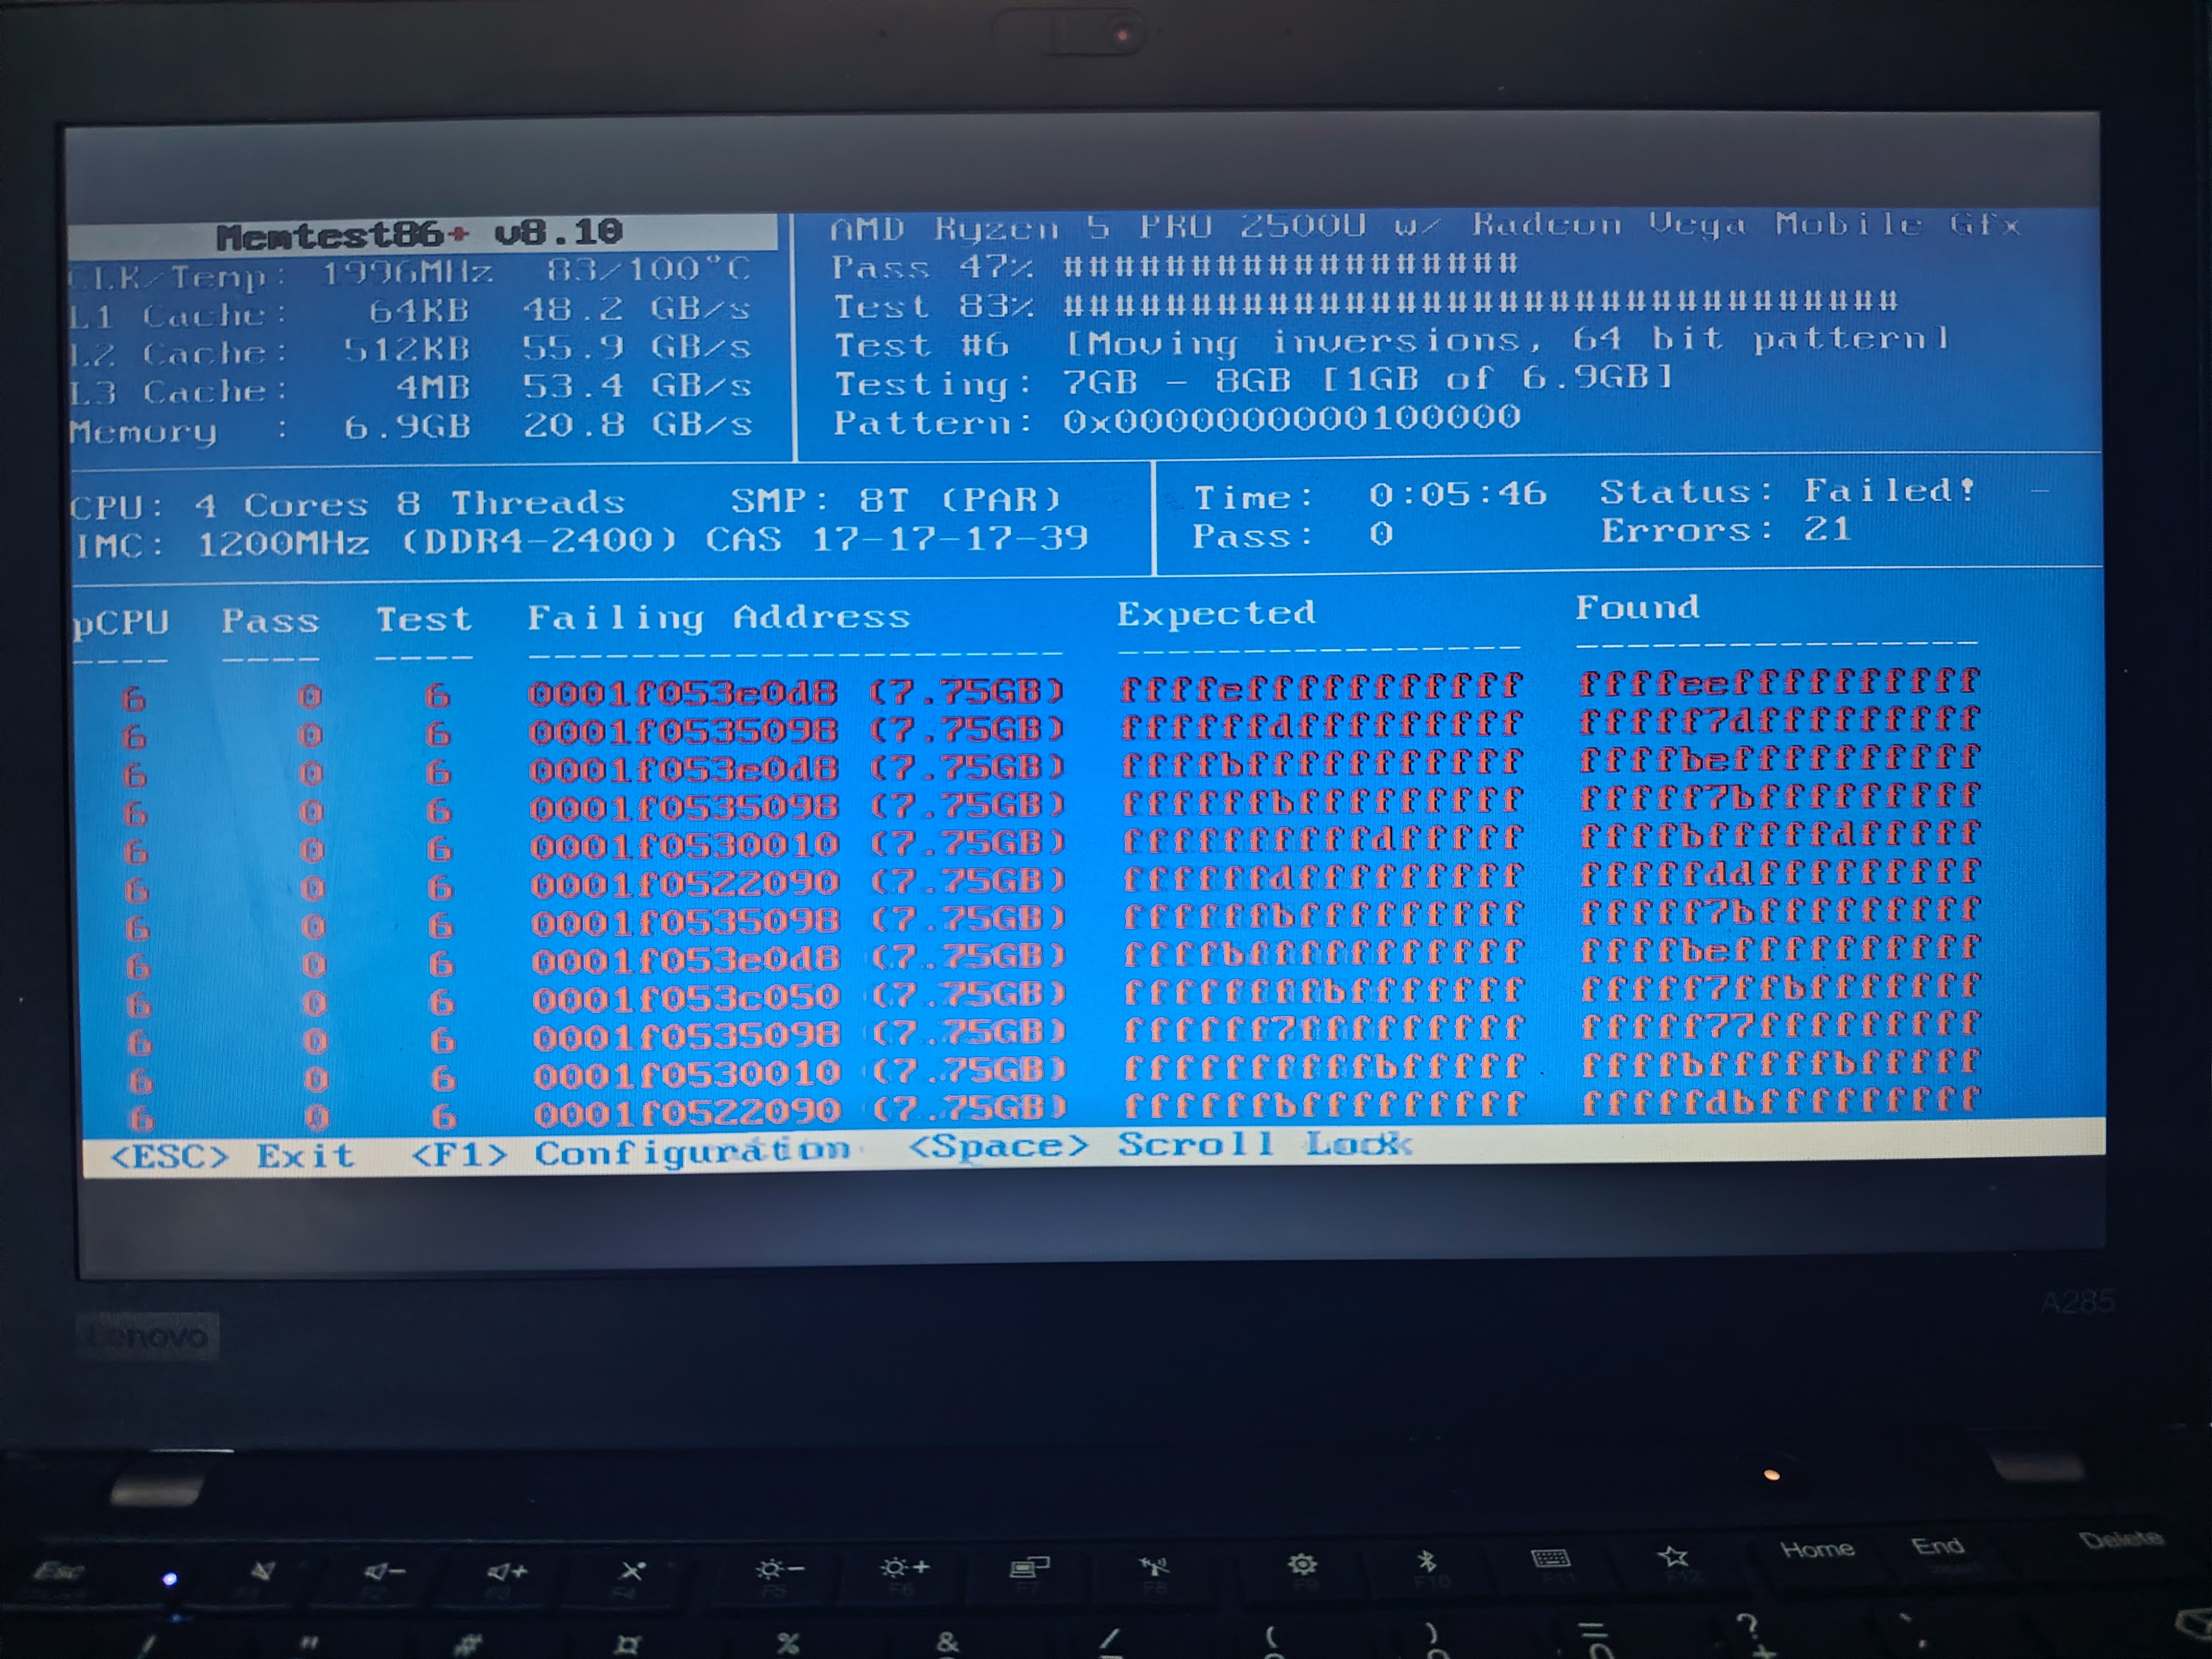
Bootable open-source Memtest86+ detected the fault immediately:
Diagnostic Lessons
1. Trust Multiple Sources
- SMART data can look healthy while corruption still exists
- Quick tests are insufficient
- Long-duration testing is essential for intermittent faults
2. BTRFS Errors Do Not Always Mean SSD Failure
btrfs device stats = 0
BUT:
BTRFS critical errors appeared anyway
The corrupted data originated from memory.
3. Kernel Logs Reveal the Truth
dmesg | grep -i "btrfs\|memory\|hardware error"
journalctl -b -1 -p err
Most Important Diagnostic Commands
Memory
sudo dnf install memtester
sudo memtester 1024 1
For a thorough test, boot Memtest86+ from USB.
BTRFS
sudo btrfs device stats /
sudo btrfs scrub start -B /
sudo btrfs scrub status /
Kernel Logs
dmesg | grep -i "memory\|hardware error\|mce"
dmesg | grep -i "btrfs"
journalctl -b -1 -p err
SMART
sudo smartctl -a /dev/nvme0n1
sudo smartctl -l error /dev/nvme0n1
Final Outcome and Recommendations
Because the ThinkPad A285 uses soldered RAM:
- Back up your data immediately
- Avoid writes to disk
- Consider replacing the system
- Prefer laptops with replaceable memory in the future
Examples:
- ThinkPad T480
- “Framework”,“Framework Computer Inc.” laptops
Isolating the Broken Memory Region
In this case the faulty region was near the upper end of the 8 GB address space.
Linux rarely used that area, which explains why the system mostly remained operational.
A practical workaround is limiting usable RAM via GRUB:
mem=7G
Or reserving a specific bad region:
memmap=512M!7680M
Modify:
sudo nano /etc/default/grub
Then regenerate GRUB configuration:
sudo grub2-mkconfig -o /boot/grub2/grub.cfg
Or on UEFI systems:
sudo grub2-mkconfig -o /boot/efi/EFI/fedora/grub.cfg
Verify after reboot:
cat /proc/cmdline
Preventing Future Problems
Regular Memory Testing
sudo dnf install memtester
sudo memtester 2048 2
Regular BTRFS Scrubs
sudo btrfs scrub start /
sudo btrfs scrub status /
Backup Strategy
Even healthy drives can become victims of memory corruption.
Recommended:
- Follow the 3-2-1 backup rule
- Use
btrfs send/receive, borgbackup, or restic - Do not rely solely on snapshots
Windows Comparison: Why Linux Won This Battle 🐧💪
If this had happened under Windows:
- BSOD before diagnostics
- Forced update interruptions
- Endless CHKDSK runs
- Constant reboot cycles
- Aggressive telemetry collection
Meanwhile Linux kept running long enough to safely recover data.
Windows: “We’ll restart your computer to fix the problem.”
Linux: “I’ll work around it and save your data.”
Conclusion
This case demonstrated how resilient Linux can be in the face of severe hardware faults.
✅ Kernel error handling protected critical components
✅ BTRFS detected corruption and switched to read-only mode
✅ The system remained usable long enough for backups
❌ Memory corruption cannot be fixed in software
❌ Corruption worsens with every write
❌ Soldered RAM makes repairs impractical
The key lesson:
Trust diagnostics, but never rely on only one test.
If symptoms persist, test the memory thoroughly — even when the SSD and software appear healthy.